

RNspeak | Nursing JournalRNspeak | Nursing JournalRNspeak | Nursing Journal
  • News
  • Nursing Stories & Tips
  • Board Exam Drills
  • Care Plans
  • Learning Resources
    • Fundamentals of Nursing
    • Anatomy and Physiology
    • Medical and Surgical Nursing
    • Surgical Nursing & Perioperative Care
    • Psychiatric Mental Health Nursing
    • Maternal & Child Nursing
    • Community Health Nursing
    • Pathophysiology
    • Pharmacology Guide
    • Nursing Research
    • Case Study
    • Clinical Skills & Lab Guides
    • Study Guide and Strategies
  • Careers
  • Nursing Video Insights
Reading: How to Insert an IV (intravenous) line
Share
Notification Show More
Font ResizerAa
RNspeak | Nursing JournalRNspeak | Nursing Journal
Font ResizerAa
  • News
  • Nursing Stories & Tips
  • Board Exam Drills
  • Care Plans
  • Learning Resources
    • Fundamentals of Nursing
    • Anatomy and Physiology
    • Medical and Surgical Nursing
    • Surgical Nursing & Perioperative Care
    • Psychiatric Mental Health Nursing
    • Maternal & Child Nursing
    • Community Health Nursing
    • Pathophysiology
    • Pharmacology Guide
    • Nursing Research
    • Case Study
    • Clinical Skills & Lab Guides
    • Study Guide and Strategies
  • Careers
  • Nursing Video Insights
Follow US

Home » Procedures » How to Insert an IV (intravenous) line

Procedures

How to Insert an IV (intravenous) line

Ira Hope RN MD
Last updated: July 14, 2020 1:44 pm
By Ira Hope RN MD
Share
3 Min Read

According to the Nursing Standards on Intravenous Practice, IV (intravenous) insertion should be done safely in the nursing practice. The ANSAP believes that nurses who practice IV therapy nursing are only those registered nurses who have been adequately trained and completed the training requirements of the IV therapy Program and are certified IV therapy nurse.

In inserting IV(intravenous) line, the most important thing to do first is to check and verify for the physician’s written order and that the patient’s condition, age, vein size, duration of therapy and functional utilization of the hand shall be assessed to make sure the IV access is safe and ideal.

Here are the steps in inserting an IV (Intravenous) line

  1. Ensure the physician’s written order for IV access or IV therapy.
  2. Check and make sure that all needed things are present (sterile/ clean gloves, IV cannula (Gauge size depends on patient’s age and condition), cotton balls with alcohol, dry cotton balls, sterile gauze, waste receptacle and/or sharps container, plaster, splint, tourniquet, and labels).
  3. Explain well the procedure to the patient and significant others and depending on institution, obtain consent from the patient.
  4. Observe proper hand hygiene before and after the procedure.
  5. Assess and choose for IV site, making sure that the working area is well lighted.
  6. Apply tourniquet to 5 to 12 cm above the injection site.
  7. Check for radial pulse below the tourniquet.
  8. Prepare the site with an effective antiseptic solution or with cotton balls with alcohol in circular motion and allow it to dry for 30 seconds (Always wear gloves when doing a venipuncture).
  9. With an appropriate IV cannula, pierce the skin with the correct technique.
  10. Upon visualization of back flow, continue inserting the cannula into the vein.
  11. Position the cannula parallel to the skin; holding the stylet stationary and slowly advance the cannula until the hub is 1mm to the puncture site.
  12. Carefully slip sterile gauze under the hub. Then release the tourniquet and remove the stylet while applying a digital pressure over the cannula with one finger about 1 to 2 inches from the tip of the inserted cannula.
  13. Then you may connect the specified infusion tubing or port prescribed by the physician.
  14. Anchor the cannula firmly with a transparent plaster or tape and a small piece of sterile OS; apply splint if needed.
  15. Label on the IV tape near the IV site to indicate the date of insertion, type and gauge of cannula and countersign.
  16. Observe the patient and encourage the patient to verbalize any discomfort. Report any untoward effect.
  17. Document the procedure in the patient’s chart and endorse thereafter to next shift.
  18. And lastly, discard sharps and waste properly according to protocol of institution.
Share This Article
Facebook Pinterest Whatsapp Whatsapp Email Copy Link Print
ByIra Hope RN MD
Gone are the days when doctors become nurses. Now the table is turned, nurses may turn to medical doctors, and I'm one of them. I can say I've been in both sides now, but still I see writing as a means of venting things out and touching lives, helping each struggling individual decipher the ever growing body of health care education.
Previous Article 25Things-nurse-hate-to-happen 25 Things Nurses Hate to Happen While on Their Duty
Next Article Nursing-Negligence Nursing Negligence and its Impact in the Nursing Profession
Leave a Comment Leave a Comment

Leave a Reply Cancel reply

Your email address will not be published. Required fields are marked *

This site uses Akismet to reduce spam. Learn how your comment data is processed.

You Might Also Like

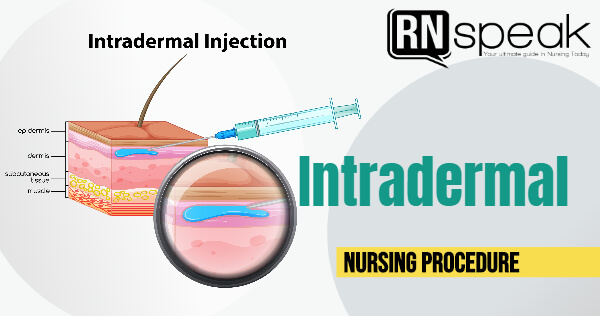
intradermalnursingprocedure
Procedures

Intradermal Injection

By RNspeak
ecginterpretation
Procedures

The 6 Steps Method on How to Interpret Electrocardiogram Results EASILY!

By Mohammad Daulog RN
foley catheter
Procedures

Urinary Catheterization: Insertion and Removal with Rationale

By RNspeak
thoracentesisnursingprocedure
Procedures

Thoracentesis Nursing Procedure

By Daisy Abastar
Rnspeak mobile logo 2020 update
Facebook X-twitter Instagram
  • About
  • Work for Us!
  • Contact
  • Privacy Policy
  • Disclaimer
  • Advertise

© 2026 RNspeak. All Rights Reserved.

Welcome Back!

Sign in to your account

Username or Email Address
Password

Lost your password?