Nurses caring for patients with tracheostomies must have a thorough knowledge of the natural anatomy of the airway and how artificial appliances affect the breathing patterns and respiration of the patient.
There is also a need to recognize the signs and symptoms of hypoxia and the skills necessary to provide effective nursing care should the tracheostomy tube accidentally dislodge. However, there is also a need to know what tracheostomy is all about and the conditions requiring a patient to have it.
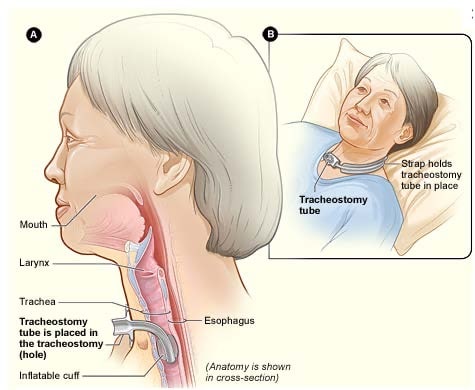
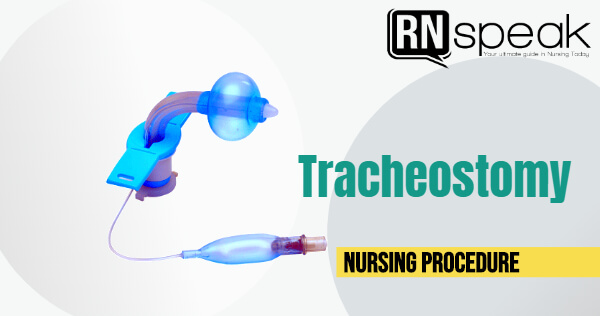
A tracheostomy is a surgically created opening in the cervical portion of the trachea. The procedure is quite common for patients who require an artificial airway, but it is not typically performed as an emergency procedure. This is because other procedures, such as oral intubation or cricothyrotomy, are much faster and less complicated than tracheostomy, especially in cases of respiratory arrest. Typically, an order is required for a tracheostomy to be performed for the following reasons:
- To bypass an airway obstruction.
- To help ensure airway patency in some patients
- As an aid to removing secretions more efficiently
- To provide better oxygenation to a patient (through mechanical ventilation or others) on a long-term basis.
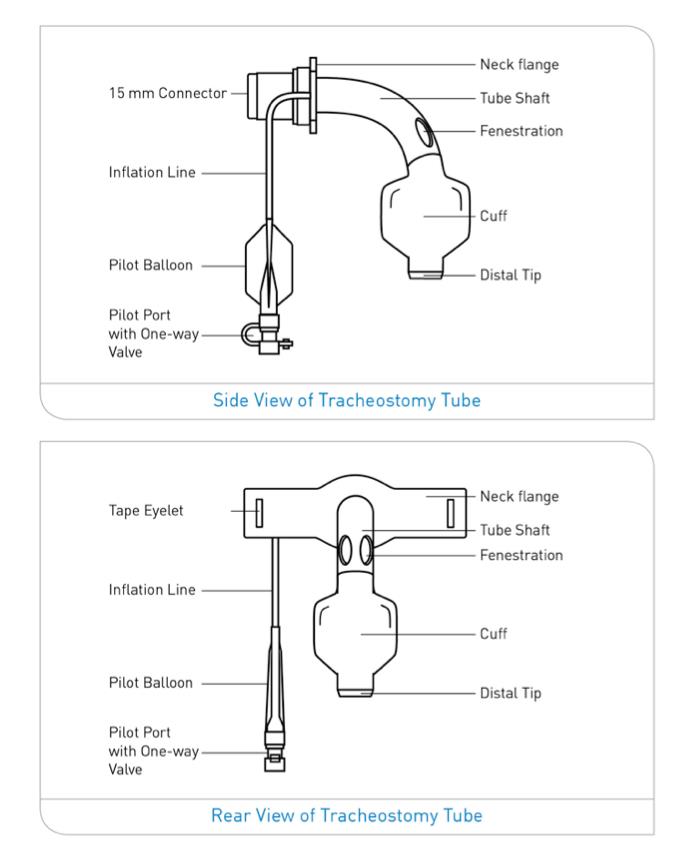
Because a tracheostomy (and related procedures such as suctioning or mechanical ventilation) is a high-risk procedure that patients must undergo, the nurse must adhere to accepted standards of practice or follow care protocols established by the health facility where they work. Furthermore, to ensure the quality of care, the nurse must be familiar with the equipment used on patients.
As mentioned previously, a tracheostomy is created to help patients with various health conditions that alter airway patency and affect gas exchange by providing an artificial airway. These are some examples:
- Stroke or comatose patients
- Patients who are suffering from laryngeal cancer
- Patients who have suffered laryngeal edema and damage because of burns
- A patient with COPD and in need of mechanical ventilation
- Pediatric patients who are suffering from congenital airway congestions
There are also anatomical abnormalities or problems that may necessitate the creation of a tracheostomy in the absence of a pathologic problem such as:
- An inherent abnormality in the anatomy of the trachea or the larynx
- Presence of a tumor or foreign object in the throat
- Severe injuries in the airway, explicitly involving the neck, throat, or mouth
- Inability to cough, swallow or expectorate sputum due to a variety of causes
Different Types of Tracheostomy Tube Insertion Procedures
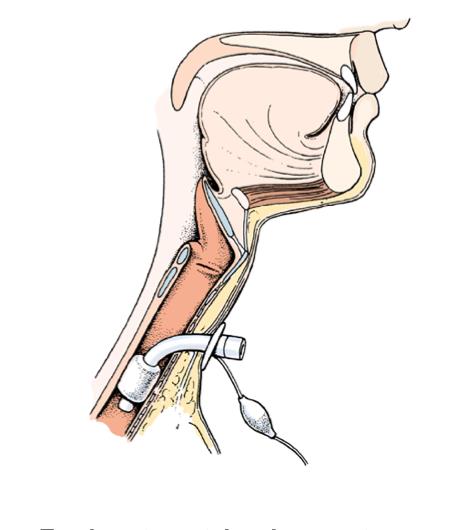
The typical procedure for inserting a tracheostomy tube is performed in the operating room while the patient is under general anesthesia. However, the procedure can also be performed while the patient is awake. Sutures are usually placed in the tracheal cartilages between the second and third or fourth tracheal cartilages (see Figure 1). The ends of these sutures are also taped to the patient’s skin and serve to stabilize the tracheostomy.
Another approach, especially when the patient is admitted to the ICU, involves creating tracheostomies at the patient’s bedside. PDT stands for percutaneous dilatational tracheostomy. The PDT is performed with a local anesthetic or narcotic sedative and a guidewire to create a stoma where the tube is inserted in less time than other tracheostomies. This procedure takes about 15 minutes and has been shown to result in fewer scars and problems. This technique, however, cannot be performed on patients who have anatomical abnormalities or coagulation problems.
The mini tracheostomy is another procedure used to create a tracheostomy. Patients no longer need to be inside the operating rooms for tracheostomies. Therefore, this surgery is also done from the bedside as a compromise step to help decongest operating rooms. This also aids in ensuring that patients are continuously monitored while keeping healthcare costs low.
Benefits and Risks of a Tracheostomy
Because tracheostomies can be performed either on a temporary or a permanent basis, it poses several benefits to the patients compared to other artificial airways created. Firstly, creating a tracheostomy will help keep the airway patent in case the tube gets dislodged. This is because the upper airway of the patient remains connected. Secondly, unlike a laryngectomy, which removes the larynx to create an artificial airway, no part of the larynx or trachea is removed.
There are also risks associated with creating a tracheostomy, ranging from those seen during the creation to those seen after the patient has been placed on long-term ventilation support. These dangers include:
- Reaction to the medications and/or anesthetics used
- Infection of the insertion site
- Bleeding tendencies
- Problems and issues with clotting
- Severe respiratory problems
- Potential of suffering from respiratory or cardiac arrest
Moreover, some patients experience other less severe complications, such as inflammation of the wound site. Some patients are also seen to suffer from an inability to expectorate sputum and difficulty adjusting to tracheostomy.
Care of the Patient After Tracheostomy Procedure
In the initial post-operative period, patients who have had a tracheostomy may experience pain and other discomforts. The patient is expected to be in a period of trying to recuperate from the trauma of the procedure and adjusting to the tube’s existence while trying to find better ways to communicate for the first 48 hours after the operation. The following can help the nurse in providing better post-procedure care to the patient:
- Assess the breathing and ability of the patient to communicate. Note for rate, rhythm and respiratory sounds, and sputum characteristics to determine potentials for complications.
- Provide patients with other means to communicate, such as writing pads.
- Monitor vital signs and document them, especially when determining when patients can be transferred to their rooms. Note for any irregularities and inform the physician.
- Avoid excessive manipulation of the tube to prevent dislodgement, especially since the stoma has the potential to close shut in the immediate post-op period.
- Assist the physician on the first tube change, which usually happens a week after creating the stoma.
- Refresh your memory on the symptoms and findings that patients who have had a tracheostomy can expect to see, such as:
- A slight increase in the respiratory secretions after the procedure
- Signs indicating imbalances in gas exchange (this can be corrected once patients are hooked to ventilation support, or taught deep breathing techniques)
- Small amounts of bleeding in the tracheostomy site
- Inflammation in the incision site in the immediate post-operative phase
- Escape of small amounts of air in the incision site (this is no cause of alarm)
Nursing Care with Rationale
| Intervention | Rationale |
| Examine the trach tube, any tubing, and equipment connected to it, as well as the stoma site. Observe for redness, purulent drainage, and abnormal bleeding around the stoma. Note the amount, color, consistency, and odor of secretions. | This step allows the nurse to determine the potential source of any problem or issues with the patient and the tubing set-up and help plan effective care. |
| Assess breath sounds, noting the depth, rate, and rhythm of respiration. Also, note for sputum production and characteristics of the expectorate. | To determine the potential or presence of a complication of the procedure or improvement of the patient’s condition. |
| If a patient needs humidification, ensure the type of humidification, the patient needs and administer it according to facility protocols. | Patients may need different forms of humidification, and these may differ in administration from one another. Ensuring the type of humidification required by the patient allows the nurse to plan for more effective care. |
Perform measures to mobilize secretions:
|
These measures help ensure that secretions are mobilized and easier to expectorate. |
If the patient needs suctioning, ensure that the steps for proper suctioning are followed:
|
Following these steps ensures that the nurse performs suctioning appropriately. The patient does not suffer from hypoxia as a complication from applying too much pressure or taking too long to suction secretions. |
| Ensure that the ties are properly secured and are changed at least once every 24 hours. | This prevents dislodgement of the tubes and maintains the integrity of the tracheostomy. Follow the facility protocols in changing the tracheostomy ties. |
| Use a sterile technique to clean the reusable cannula with half-strength hydrogen peroxide, standard saline solution, or normal saline. | This prevents the buildup of mucus and other sediments in the cannula and prevents infections. |
| Cuff pressure should be maintained in a range from 20 mmHg to 25 mmHg. | Complications can arise quickly from the excessive pressure that can inhibit capillary perfusion. |
| Clean the stoma with a Q-tip or gauze square moistened with normal saline solution (NSS). Avoid using hydrogen peroxide unless the site is infected. | Using hydrogen peroxide can impair the healing of the stoma site. |
Nursing Diagnoses
Potential and actual nursing problems can be seen among patients who have a tracheostomy. These nursing problems can be identified using a thorough assessment of the patient, which involves considering the patient’s verbalization and symptoms and correlating these with the physical evaluation and laboratory data.
- Ineffective airway clearance
- High risk for aspiration
- Ineffective breathing pattern
- Impaired gas exchange
- Inability to maintain spontaneous ventilation
- High risk for infection
- Impaired swallowing
- High risk for impaired skin integrity
- Altered oral mucous membrane
- Fear
- Anxiety
- Situational low self-esteem
- Knowledge deficit
- Health seeking behavior
Patient Education
The goal of tracheostomy for patients is to help improve oxygenation, ventilation, and gas exchange. While some of these are created temporarily, some patients require to have the tracheostomy on a long-term basis. Therefore, patient education is an essential aspect of care and should include both the patient and his significant others. Below are some patient education reminders to help ensure that the goal of creating a tracheostomy is met:
- Prior to health education, allow the patient to verbalize his thoughts and feelings related to the tracheostomy as this would help facilitate better patient education.
- Include alternative ways for communication in the teaching plan, such as using pens and paper, writing slabs and flashcards to allow the patient to convey his thoughts.
- Demonstrate to the patient and significant others the process of cleaning the stoma, changing the ties and tube replacement, and asking them to demonstrate it back to ensure that they can do it with the correct technique.
- Stress the importance of properly securing the appliance/tube in the stoma and not pressing on other structures to prevent impeding circulation and ulceration along with the insertion site.
- Remind the patient to cover the hole with a cloth when outside to prevent dust, powder, and pollen from entering the site.
- Teach proper ways of humidifying the air.
- Remind the patient that he cannot engage in swimming or anything else that poses a risk of aspiration.
- Include in the teaching signs of a healthy stoma and what symptoms should be reported to the physician.
References
- Basavanthappa, B., (2015). Medical Surgical Nursing. New Delhi: Jaypee Brothers Medical Publishers.
- Billings, D. and Hensel, D., 2019. Lippincott Q & A Review For NCLEX-RN. 13th ed. St. Louis, MO., USA.: Wolters Kluwer Medical.
- Hinkle, J.L. & Cheever, K.H. (2018). Brunner & Suddarth’s Textbook of Medical-Surgical Nursing (14th ed.). Philadelphia: Wolters Kluwer.
- Morton, P., & Fontaine, D. (2018). Critical Care Nursing. Wolters Kluwer.
- Potter, P.A., Perry, A.G., Stockert, P.A., & Hall, A.M. (2019). Essentials for Nursing Practice (9th ed.). St. Louis: Elsevier.




@ Mike Hablang: =) Sana nga po it is easy just like that, but in doing this, we really need sterile technique…
@ Barbara Bansale: Your additional informations could really help. Thanks a lot! The cuff should really be inflated just to really make sure that the tube is in place while doing the changing. and yes, the manual rescucitation bag, just in case the patient becomes distress. Thanks a lot! =)